How to Import Windows Live Mail to Thunderbird


So in this article, I will cover the topic of how to import Windows Live Mail to Thunderbird without any tool and if you are also looking for a solution to the same question, then continue reading…
Due to several problems, many users are moving from Windows Live Mail to Thunderbird these days. Additionally, Thunderbird is one of the most popular desktop-based email clients which is accepted MBOX file format type, and it is supported by a wide range of email services, including Apple Mail, Eudora, and Google Takeout, among others.
In the next paragraph, I will explain to you why users are moving from Windows live mail to Thunderbird and step-by-step manual ways to easily import Windows live mail to Thunderbird.
let’s just start the Topic…
Reasons behind Import Windows live Mail to Thunderbird
- Thunderbird is much better than Windows Live Mail and also Thunderbird has great features.
- Thunderbird is less complex than Windows Live Mail.
- When it comes to Windows live mail, Microsoft does not assist.
Manual approaches
There is no direct way to import Windows Live Mail to Thunderbird. EML files are accessible by both Windows Live Mail and Thunderbird, we will first import Windows Live Mail and then manually import them into Thunderbird to complete the process.
Step 1 – Import EML file from Windows live mail
- Download the “Windows Live Mail” application.
- Now go to the File select messages and then Windows live mail.
- Select browse to Access Emails>>Next.
- Choose “Now On” to export the folder.
- Lastly, click on the “Finish” icon.
Step 2 – Import EML file to Thunderbird
- Firstly, make a folder from click “Right” on any folder and choose “New Folder”
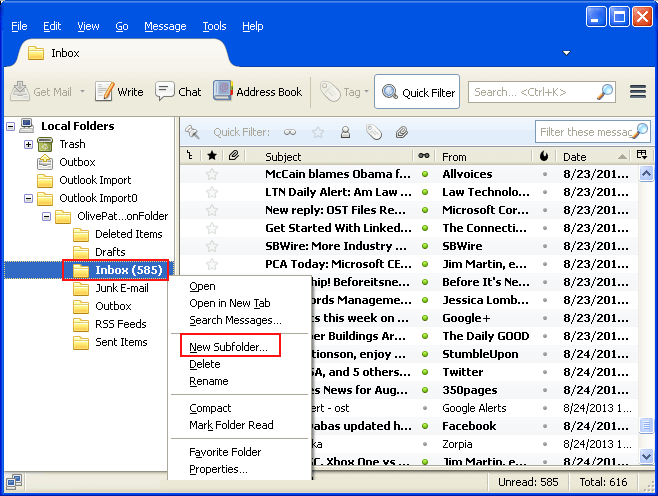
- Give a name to a New Folder and click Create a New Folder.
- Next, go to the location and choose the EML file folder.
- Drag the EML file to the New Folder in Thunderbird.
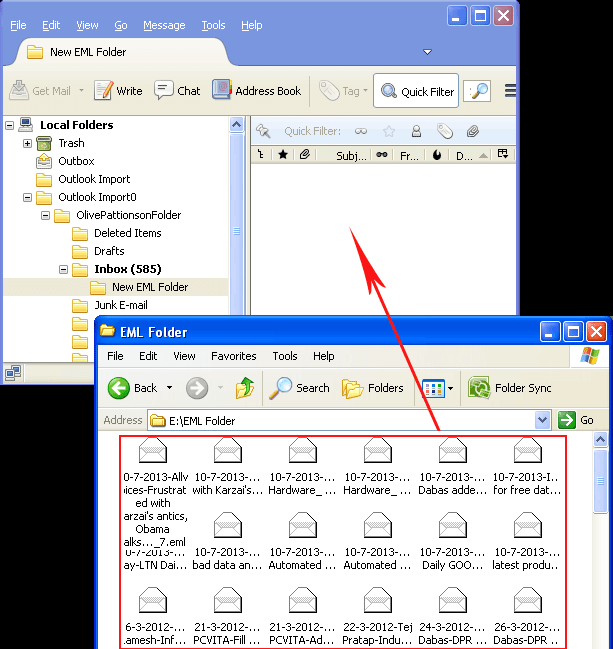
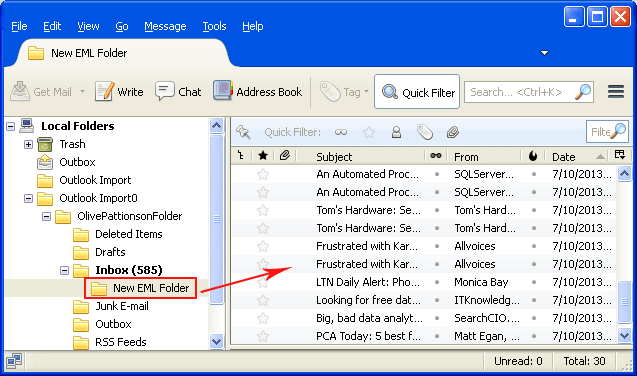
- Now your EML file will completely transfer to your new Thunderbird folder.
Step 3 – By using the Import/export tool
- Install the import/export tool and save it to the device.
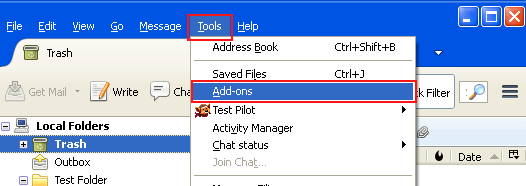
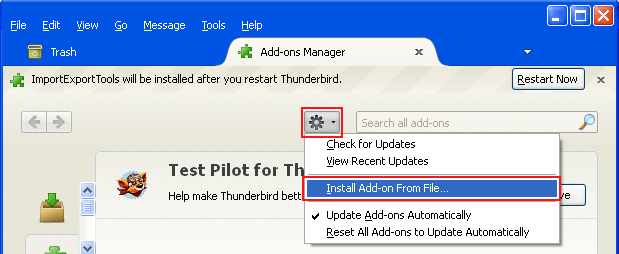
- Next in Thunderbird select Tools (from the menu) and Press on Add-Ons.
- Now from the Gear button select “Install Add-ons from file” (will automatically install).
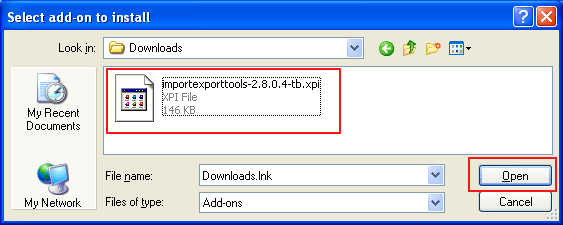
- Find the location of the import/export tool and open the file.
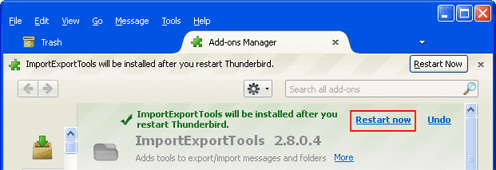
- Select install now and restart the Thunderbird.
- Make a new folder in Thunderbird and give a name to the folder.
- Now click right on the new folder and choose the import/export tool and select all messages.
- Choose the default directories that hold EML files. Next Hit OK.
- Two sub-folders have been imported into the Test Folder. Additionally available is a count of the number of EML files that have been imported.

- Lastly, the EML file will be imported into Thunderbird may be seen by selecting a folder.
Summary
In a conclusion, all of the manual techniques listed above are excellent, but they are not simple for non-technical users because they have limitations such as the inability to import multiple files, the length and time required, and the possibility of data loss. if you are willing to take a risk go with Manual techniques otherwise you may utilize third-party tools.